
In my previous guide, I demonstrated the detailed process of how to download and install VirtualBox on your computer.
In this guide, I will walk you through the steps needed to set up a Windows 11 Lab Machine within VirtualBox.
Although setting up a Windows 11 virtual machine in VirtualBox requires a few more steps compared to the Quick Setup option available in Hyper-V, the process is still quite manageable and straightforward once you get familiar with it.
All the code and information provided on this website are offered “as is” without any guarantees or warranties of any kind. Although the code and information are tested, we do not warrant that the code is error-free or that it will meet your specific requirements. Use the code at your own risk. We disclaim all liability for any damages or losses arising from the use or inability to use the provided materials.
Download Windows 11
I will guide you through setting up an evaluation version of Windows 11, making the process simple and accessible for everyone. If you already have a licensed copy, you can use it as well.
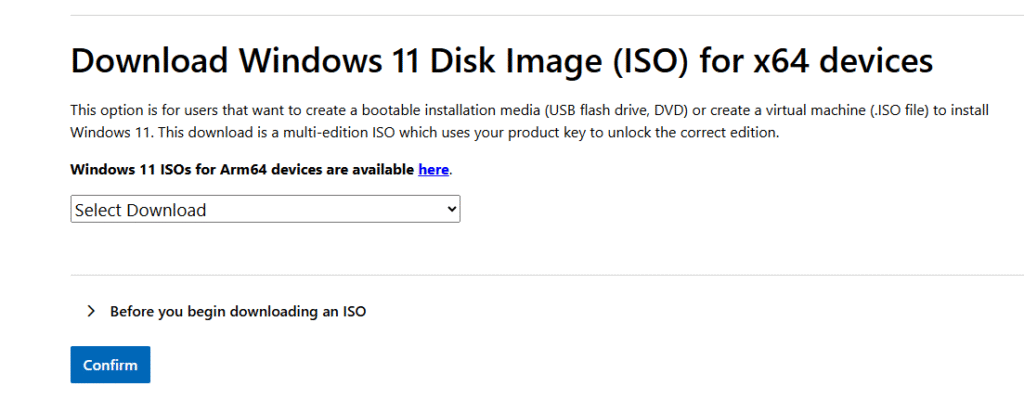
In VirtualBox, you can install Windows 11 using an ISO file. You can download the ISO file here.
Simply scroll down to the section labeled “Download Windows 11 Disk Image (ISO) for x64 devices,” select your edition, click Download, and then press Confirm.
Next, select the language and click Confirm.
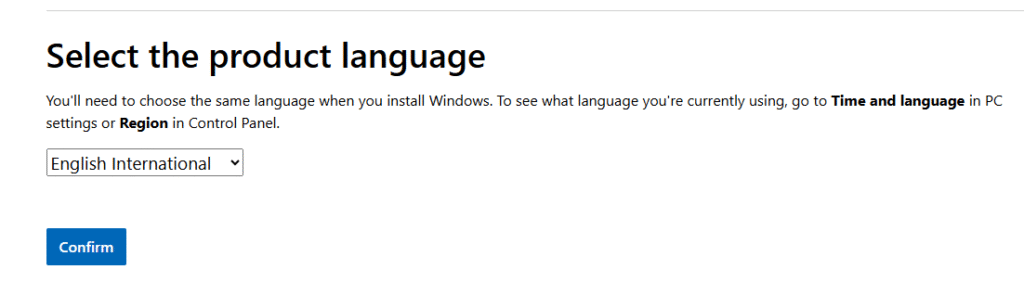
I have selected English International for this guide.

Just click 64-bit Download.
The download size is approximately 5.4GB.
Once the ISO has been downloaded, you can proceed to the next step.
Create Virtual Machine
In this step we will Create a Virtual Machine in Virtual Box.
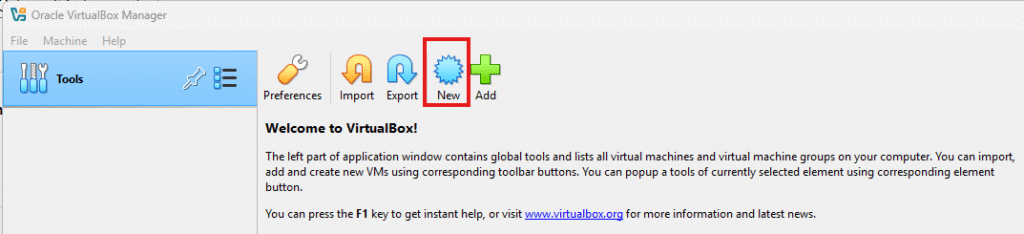
Start VirtualBox and click on New.
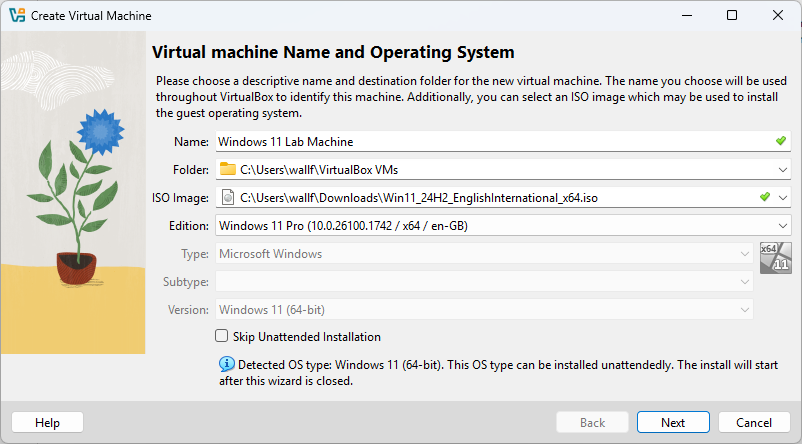
Now you need to provide some information
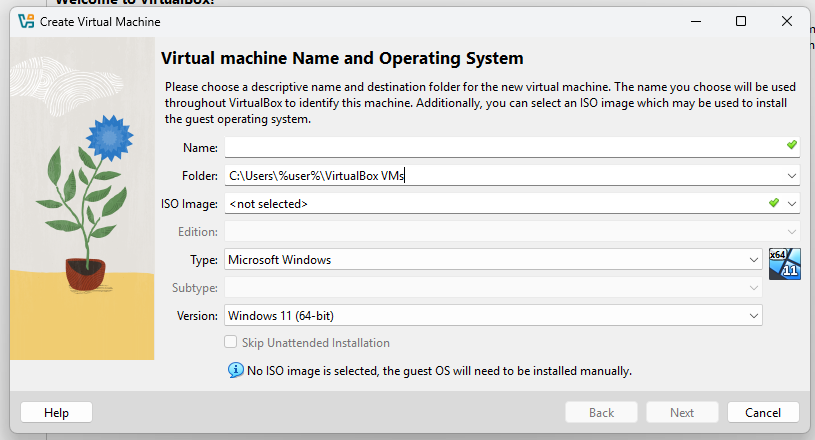
Name: Windows 11 Lab Machine
Feel free to select any name you prefer!
Folder: The chosen folder is easy to use and you will have access to it.
Please ensure there is enough free space available on the hard drive!
ISO Image: Click the arrow on the right and select Other…
Then navigate to the ISO file you downloaded earlier.
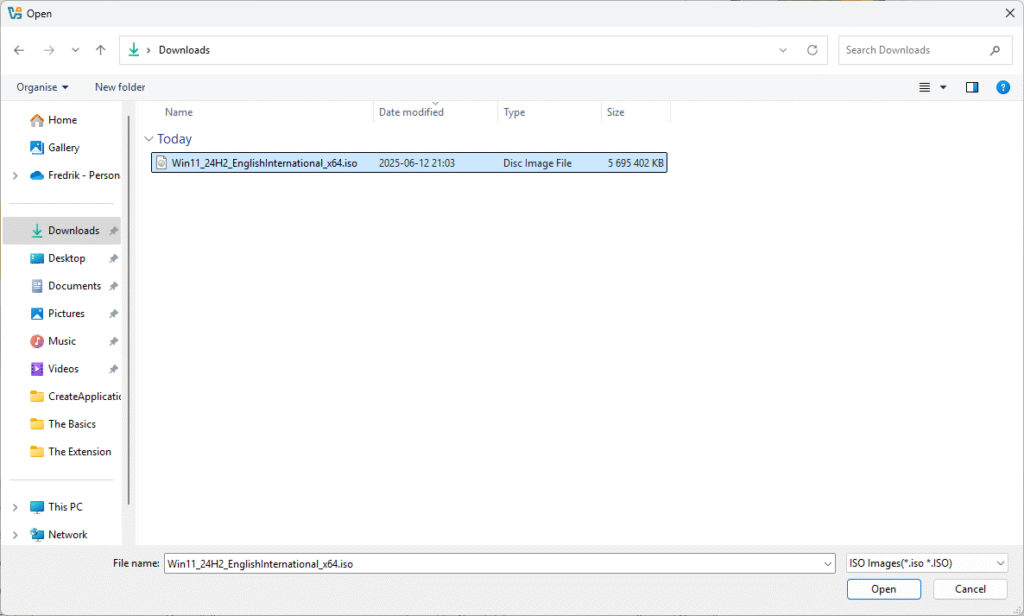
Then click Open
Edition: Select from a variety of options available.
I choose Windows 11 pro for this guide.
Then click Next
VirtualBox facilitates unattended Guest OS installation.
Now, let’s provide some details.
Username: vboxuser is a solid option, but you can pick another if you prefer.
Password: Create a strong password and make sure to record it!
Product Key: Use the default key to obtain an evaluation copy
Hostname: I use Win11Lab01, you can choose another one, but the default name will not work.
Domain Name: Default will work for this Lab Machine.
VirtualBox Guest Additions are a set of drivers and system applications that enhance the performance and usability of virtual machines.
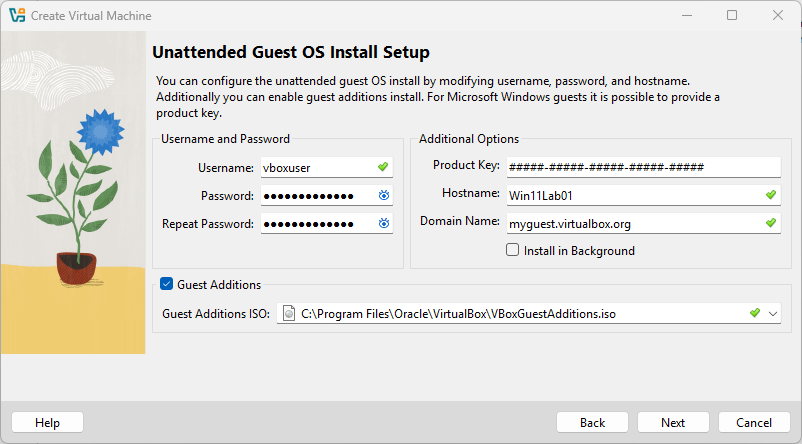
Next, click Next.
Then select the amount of memory and the number of virtual processors you’d like to allocate to this Virtual Machine.
The default settings are sufficient for most use cases.
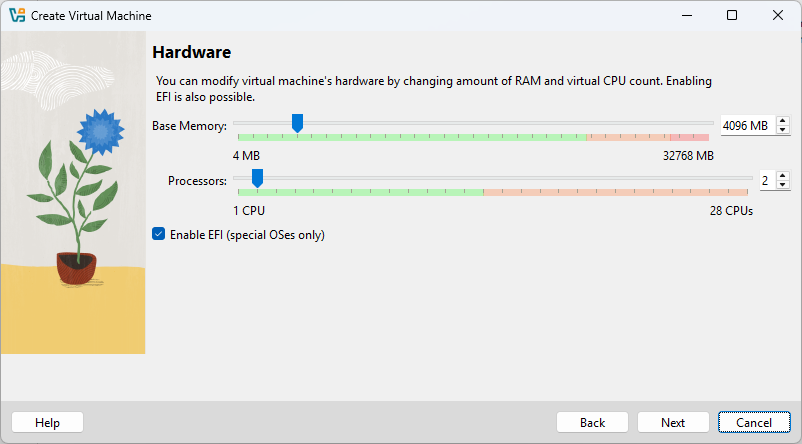
Next, let’s create a Virtual Hard Drive. Simply click Next to continue.
Please ensure you have at least 80GB of free disk space available before proceeding!
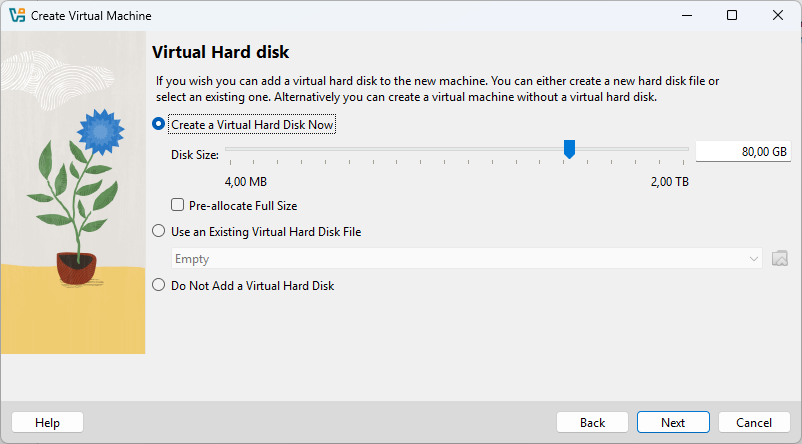
When you click Next, you will see a Summary. Simply click Finish to complete the process.
The process to Create a new Virtual Machine will start.
But you need to Press any key to boot from CD or DVD…
Or you will get this prompt:
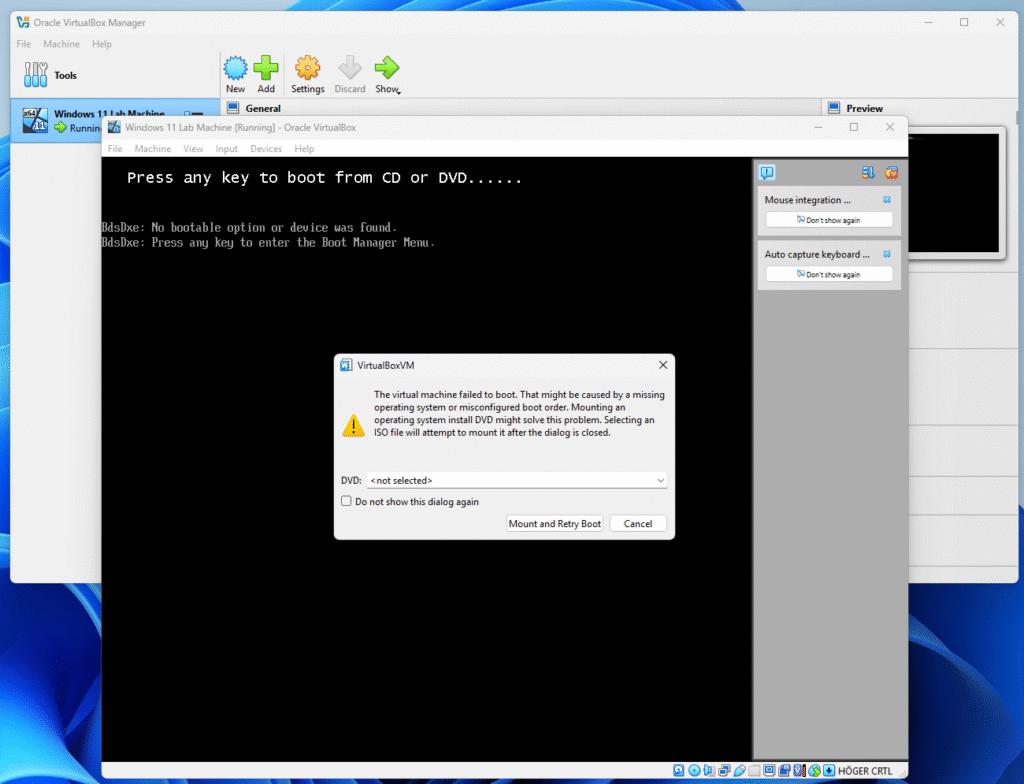
Choose the ISO file in the DVD drop down list and press Mount and Retry Boot.
This time, be sure to press any key (and tap the screen with the mouse first).
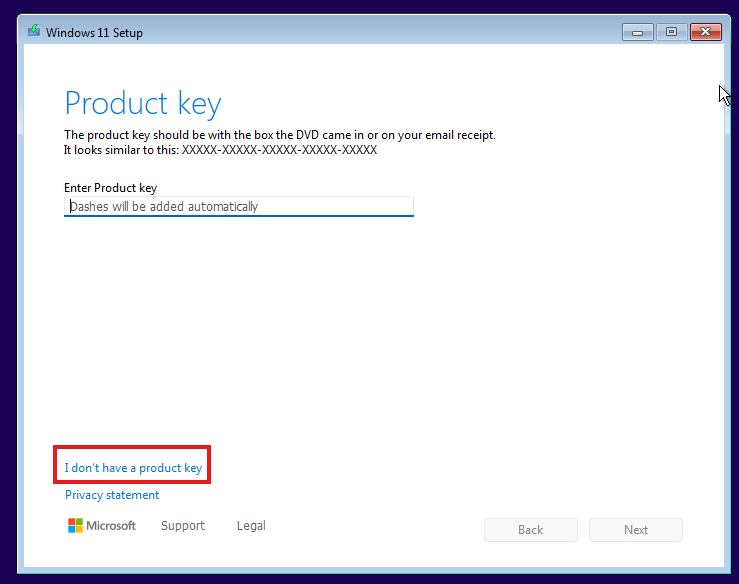
If the Product Key window appears, simply click I don’t have a product key.
Now the installation will start
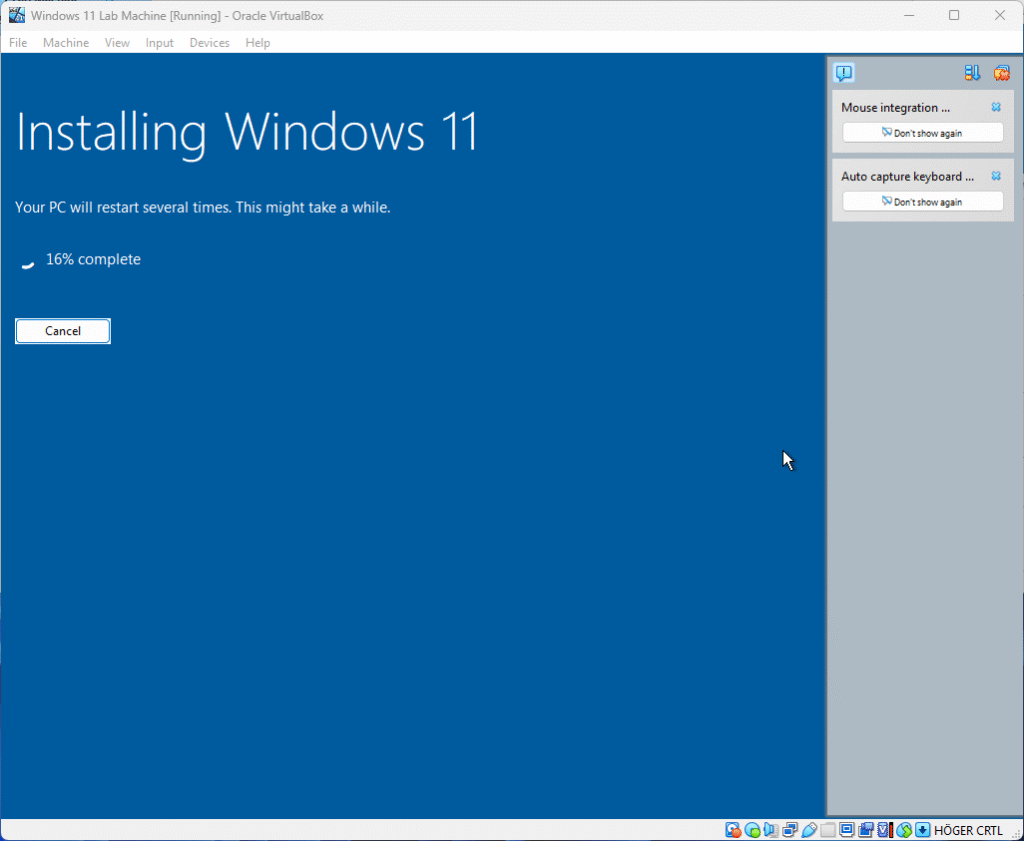

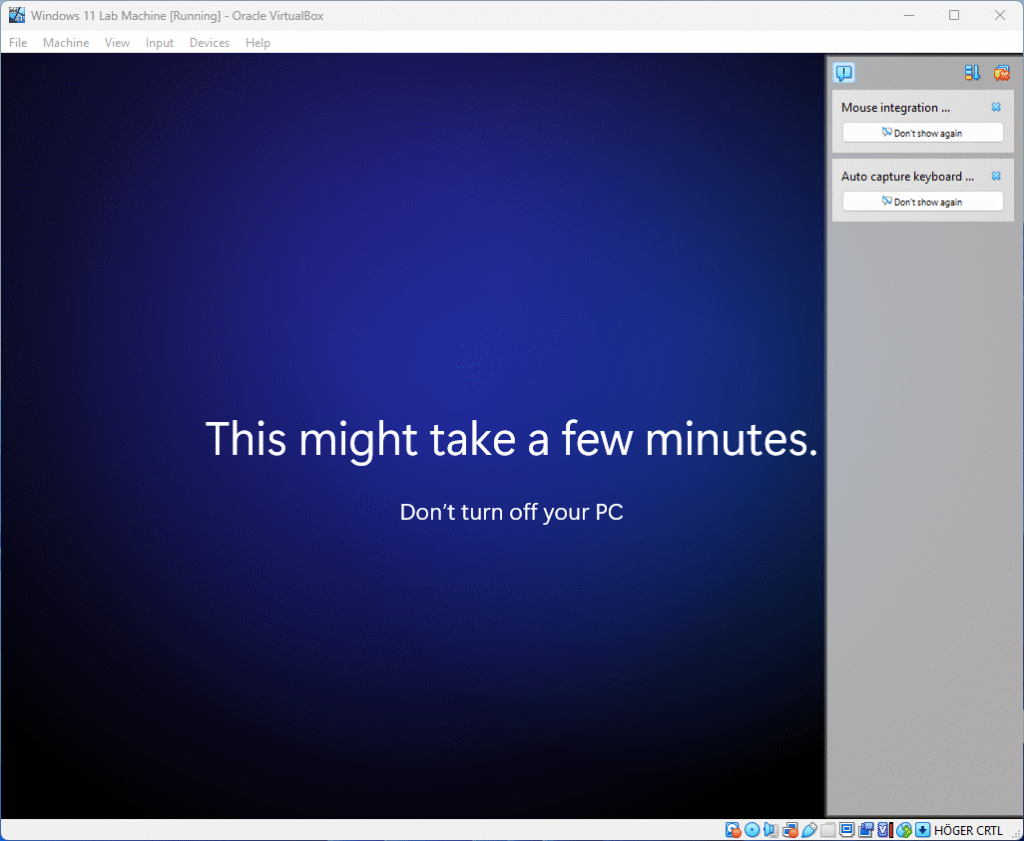
When you see the screen below, please wait a moment for the initial setup to complete. Once ready, you can proceed.
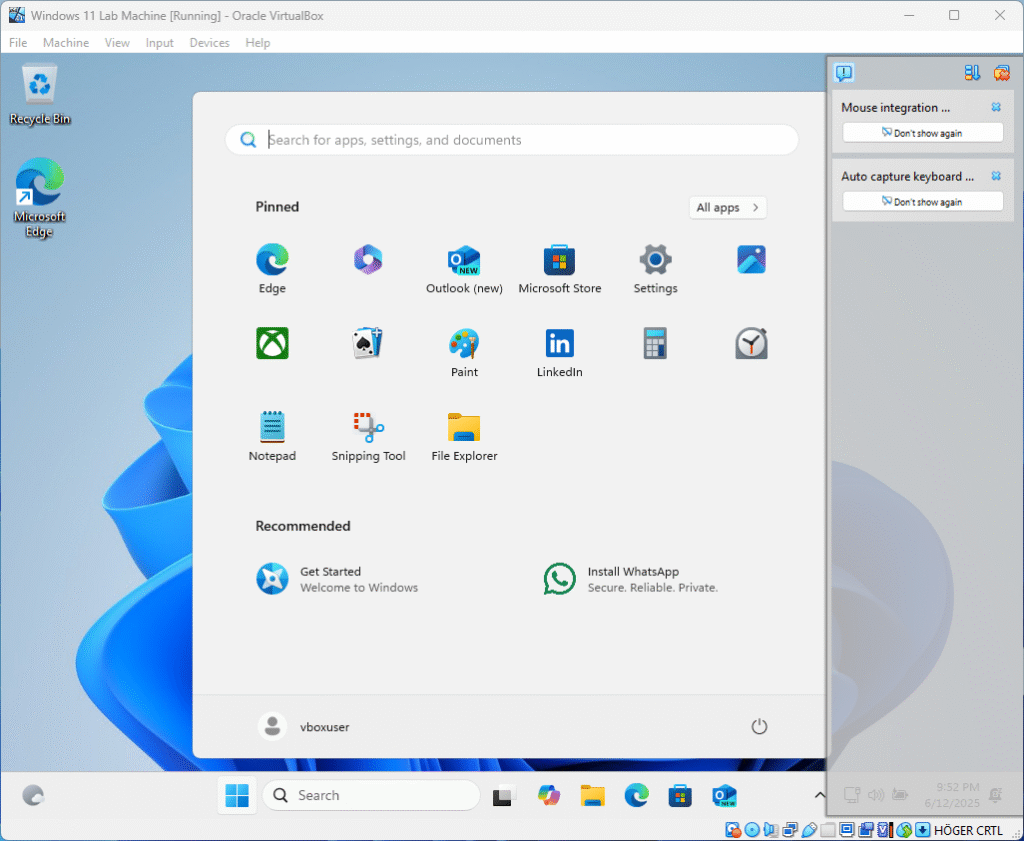
You can now maximize the window for a better view.
Simply click the maximize button in the upper right corner.
On the right side of the screen, you may see the same information as shown in the picture above.
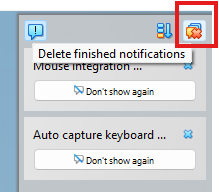
To remove it, click the icon on the right, as shown in the image below.
Now that the operating system installation is complete, we can move on to configuring the language settings.
Before that, we need to restart the Virtual Machine to be able to enable all features of the VirtualBox Guest Additions, such as copying and pasting between your computer and the Virtual Lab Machine.
After the restart, we need to enable the Shared Clipboard for this virtual machine and possibly activate Drag and Drop functionality between the host and guest operating systems.
We can do this in the menu under Devices.
Copy and Paste
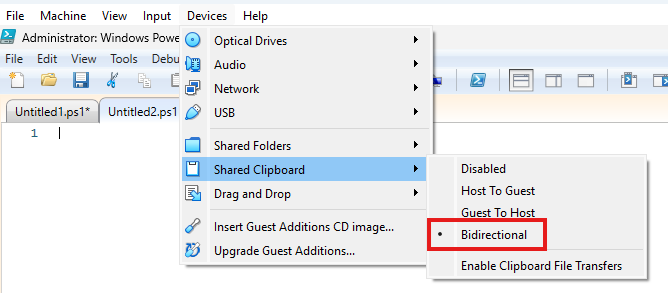
I use Bidirectional to be able to Copy and Paste to and from the Lab Computer.
Drag and Drop
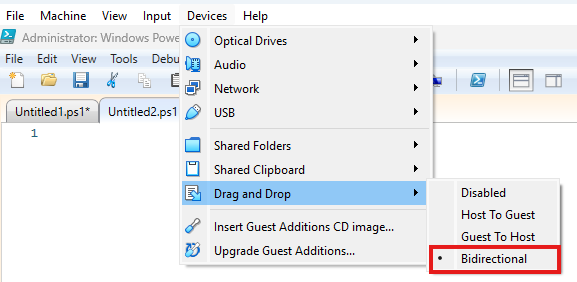
I use Bidirectional here too.
Take Snapshot
Before using the Lab Computer, it’s a good idea to create a snapshot that you can restore later if needed.
You can do this now or after setting the language.
To do this, go to the menu, select Machine, and then click Take Snapshot…
Name the Snapshot after what it is.
Like Clean Install

Now you can see the Snapshot name with your Virtual Machine.

Setup the lab computer
This step will show you how to set up the Windows Language settings as we want and install all tools needed for PowerShell and Visual Studio Code in the Lab Machine.
This is the same steps as in the guide how to setup a Lab Machine on Hyper-V.
Language
First, open PowerShell ISE as Administrator.
Click the arrow next to Script to open the Editor in PowerShell ISE.
Then close the Commands view on the right to have more space for scripting.

First of all I want to set all language settings to Swedish.
Just copy and past the code below and run it to do the changes.
You can do it bit by bit or all at once.
This can be done in different ways but I like my scripts to have more checks built in.
So this is not the easiest way 😊
We start with a check for Run As Administrator and a Clear-Host.
# Check if the script is running with administrative privileges
#Requires -RunAsAdministrator

# Clear the terminal part
Clear-Host
Then we set the input method to Swedish if it is not already.
# Set the default input method to Swedish (Sweden) - Keyboard layout: Swedish
if ((Get-WinDefaultInputMethodOverride).InputMethodTip -ne "041D:0000041D") {
    Set-WinDefaultInputMethodOverride -InputTip "041D:0000041D"
}
If you want another input method you can look at the Default input profiles (input locales) in Windows page at Microsoft Learn for more language codes.
You just need to use the same language codes for the Get and for the Set.
And now we change the user language list to Swedish.
# Set the user language list to Swedish (Sweden)
if ((Get-WinUserLanguageList).LanguageTag -notcontains "sv-SE") {
    Set-WinUserLanguageList -LanguageList "sv-SE" -Force
}
For this one you will get this warning and it’s normal:
WARNING: If the Windows Display Language has changed, it will take effect after the next sign-in.
And to set the system locale to Swedish we write:
# Set the system locale to Swedish (Sweden)
if ((Get-WinSystemLocale).Name -ne "sv-SE") {
    Set-WinSystemLocale -SystemLocale "sv-SE"
}
Setting user locale to Swedish:
# Set the user locale to Swedish (Sweden)
if ((Get-Culture).Name -ne "sv-SE") {
    Set-Culture -CultureInfo "sv-SE"
}
Home location:
# Set the home location to Sweden
if ((Get-WinHomeLocation).GeoID -ne "221") {
    Set-WinHomeLocation -GeoID "221"
}
For a table of GeoIDs, see Table of Geographical Locations at Microsoft Learn.
The last language setting is the Time Zone:
# Ensure the time zone is set to W. Europe Standard Time (CET/CEST)
if ((Get-TimeZone).Id -ne "W. Europe Standard Time") {
    Set-TimeZone -Id "W. Europe Standard Time"
}
To get another time zone, you can use the cmdlet Get-TimeZone.
Get-TimeZone -ListAvailableThe last step for the Language section is to restart the Lab computer.
This can be done manually or with PowerShell.
Using PowerShell for a quick restart, we do the following:
Restart-Computer -Force -Confirm:$falseNow we have the following code:
<#
.SYNOPSIS
    Configures Windows system and user locale settings for Swedish (Sweden).

.DESCRIPTION
    This script sets the following to Swedish (Sweden):
    - Default input method (keyboard layout)
    - User language list
    - System locale
    - User locale
    - Home location (region)
    - Time zone (W. Europe Standard Time)
    The script will restart the computer to apply changes.

.NOTES
    Requires administrative privileges.
    Some changes may require a restart to take effect.
#>

# Check if the script is running with administrative privileges
#Requires -RunAsAdministrator

# Clear the terminal part
Clear-Host

# Set the default input method to Swedish (Sweden) - Keyboard layout: Swedish
if ((Get-WinDefaultInputMethodOverride).InputMethodTip -ne "041D:0000041D") {
    Set-WinDefaultInputMethodOverride -InputTip "041D:0000041D"
}

# Set the user language list to Swedish (Sweden)
if ((Get-WinUserLanguageList).LanguageTag -notcontains "sv-SE") {
    Set-WinUserLanguageList -LanguageList "sv-SE" -Force
}

# Set the system locale to Swedish (Sweden)
if ((Get-WinSystemLocale).Name -ne "sv-SE") {
    Set-WinSystemLocale -SystemLocale "sv-SE"
}

# Set the user locale to Swedish (Sweden)
if ((Get-Culture).Name -ne "sv-SE") {
    Set-Culture -CultureInfo "sv-SE"
}

# Set the home location to Sweden
if ((Get-WinHomeLocation).GeoID -ne "221") {
    Set-WinHomeLocation -GeoID "221"
}

# Ensure the time zone is set to W. Europe Standard Time (CET/CEST)
if ((Get-TimeZone).Id -ne "W. Europe Standard Time") {
    Set-TimeZone -Id "W. Europe Standard Time"
}

Restart-Computer -Force -Confirm:$false
Windows should now have all language settings configured to Swedish or your preferred language.
PowerShell 7
Now that the language has been successfully set, we can move forward with the next step, which is installing PowerShell 7. This installation is essential to enable and run labs that specifically require PowerShell 7 for their execution and functionality.
The simplest and officially recommended method by Microsoft to install PowerShell 7 on Windows is by using WinGet.
However, this method will only be effective if the lab computer is completely and thoroughly updated with the latest system updates. Without having the most recent updates installed, WinGet will not operate correctly and may encounter various issues or fail to function altogether.
The simplest and most straightforward way to ensure your system is fully up to date is to manually navigate to the Check for Updates section and carefully install all available updates. This process should include not only the critical and recommended updates but also optional ones, such as those related to .NET framework components, which can be essential for certain applications to function properly.
Start Windows PowerShell with Administrator privileges to ensure you have the necessary permissions.
Then enter the following command:
winget list --id Microsoft.PowerShellAfter reviewing the MS Store terms carefully, proceed by pressing the Y key to indicate your agreement and acceptance of all the conditions outlined.
Now we can start PowerShell ISE as administrator and write the following code:
# Check if the script is running with administrative privileges
#Requires -RunAsAdministrator

# Clear the terminal part
Clear-Host

# Check if PowerShell 7 is installed using winget
$Pwsh = winget list --id Microsoft.PowerShell | Select-String "PowerShell"
if ($Pwsh) {
    Write-Output "PowerShell 7 is installed."
} else {
    Write-Output "PowerShell 7 is NOT installed."
    # Install PowerShell 7
    winget install --id Microsoft.PowerShell --source winget --accept-source-agreements --accept-package-agreements
}
PowerShell will be downloaded and installed automatically.
Visual Studio Code
Now it is time to move forward and proceed with the installation of Visual Studio Code on the Lab computer, ensuring that we have the latest tools ready for our development work.
We will perform this installation process using WinGet along with PowerShell, following the same method we previously used when installing PowerShell 7, to maintain consistency and efficiency in our setup steps.
# Check if the script is running with administrative privileges
#Requires -RunAsAdministrator

# Clear the terminal part
Clear-Host

# Install Visual Studio Code
# Check if Visual Studio Code is installed using winget
$VsCode = winget list --id Microsoft.VisualStudioCode | Select-String "Visual Studio Code"
if ($VsCode) {
    Write-Output "Visual Studio Code is installed."
} else {
    Write-Output "Visual Studio Code is NOT installed."
    # Install Visual Studio Code
    winget install --id Microsoft.VisualStudioCode --source winget --accept-source-agreements --accept-package-agreements
}
Visual Studio Code will be downloaded and installed automatically.
VSCode Extensions
Now we are fully prepared and ready to start working with our development environment.
HOWEVER, Visual Studio Code (VSCode) becomes much more powerful and enjoyable to use when enhanced with some useful extensions, and I personally recommend these 5 essential extensions as a great starter kit to improve your workflow.
PowerShell for Visual Studio Code
This extension allows you to seamlessly integrate full PowerShell support within Visual Studio Code, making scripting and command execution much easier and more efficient.
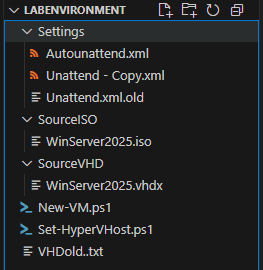
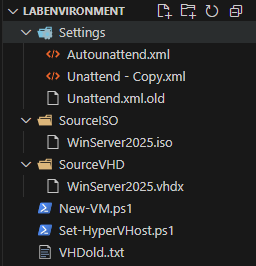
VSCode-Icons
This extension adds visually appealing and distinctive icons to the Explorer view, helping you quickly identify file types and folders.
After installing, you must enable it within the extensions panel to activate the icon set.
Without:
With:
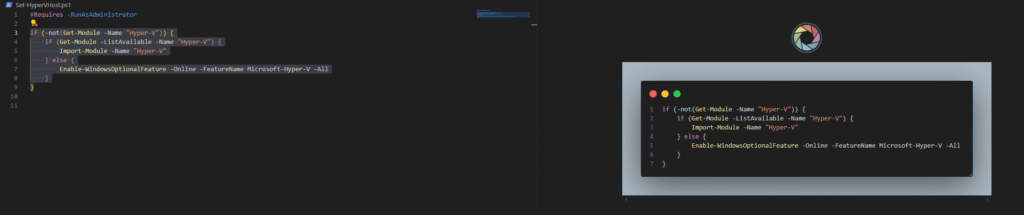
CodeSnap
Takes a clear and nice screenshot of your code and saves it to a file on your computer.
Press Ctrl-Shift-P to open the Command Palette, then type CodeSnap in the search bar, and select the CodeSnap option from the list.
After that, simply highlight the portion of code you want to capture, and the tool will create a neat screenshot for you.
Then press the shutter button to capture the image and save the screenshot to your desired location.
The picture shown below is taken from the CodeSnap extension.

GitHub CoPilot
GitHub CoPilot provides you with the incredible power of artificial intelligence directly within Visual Studio Code, making your coding experience much more efficient and enjoyable.
All you need to start using this amazing tool is a simple GitHub account, which enables you to access its full range of features without any hassle.
In my opinion, it is especially useful for assisting with the creation of documentation and for debugging code, offering valuable suggestions and insights that can save time and improve the quality of your projects.
XML Tools
XML Tools by Josh Johnson.
I frequently work with XML files in my projects, and this tool has proven to be incredibly helpful for me. It assists greatly with the formatting of XML files whenever it is needed, making the process much smoother and more efficient.
Install Extensions
To install extensions, you have several options available. You can easily do it directly from Visual Studio Code using the graphical user interface (GUI), which provides a user-friendly way to browse and add extensions. Alternatively, if you prefer using the command line, you can install extensions through PowerShell or from a Command Prompt window running with administrator privileges. Each method allows you to efficiently manage your extensions according to your preferred workflow.
# Install PowerShell Extension
code --install-extension ms-vscode.PowerShell

# Install VSCode-Icons Extension
code --install-extension vscode-icons-team.vscode-icons

# Install CodeSnap Extension
code --install-extension adpyke.codesnap

# Install GitHub CoPilot incl CoPilot Chat Extension
code --install-extension github.copilot

# Install XML Tools by Josh Johnson
code --install-extension dotjoshjohnson.xml
If you get an error when doing this It’s probably because you did not restart PowerShell after you installed Visual Studio Code.
Restore Snapshot
To revert to the snapshot you created after installing Windows 11, simply shut down your computer.
And then look at the VirtualBox Manager and your Virtual Machine.

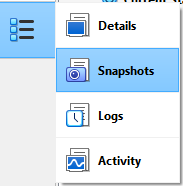
Click the lines on the right, then select Snapshot.
Click on the Snapshot you want to restore.

And then click on Restore.

You can choose to have VirtualBox create a snapshot of the current machine state.
The End
This marks the official conclusion of this comprehensive and detailed guide.
Up to this point, we have successfully completed the setup of a Lab computer that is fully equipped with the latest version of PowerShell 7 (7.5). In addition, we have installed the powerful and versatile Visual Studio Code editor along with five carefully selected and highly useful extensions.
All of these components are running smoothly and efficiently within a VirtualBox virtual environment. Furthermore, the system has been configured with the appropriate language settings to significantly enhance overall usability and user experience.
This guide was little bit longer then the guide with Hyper-V, but I think if you have followed all of the steps it should not be difficult.
It is my sincere hope that this guide will assist you in setting up your Lab environment quickly and efficiently, allowing you to have a strong and effective start to your Lab experience.
Leave a Reply